-
Blake.Chu sales consultant
-
Email: 113217160@qq.com
-
Phone/WeChat +86 19129108136
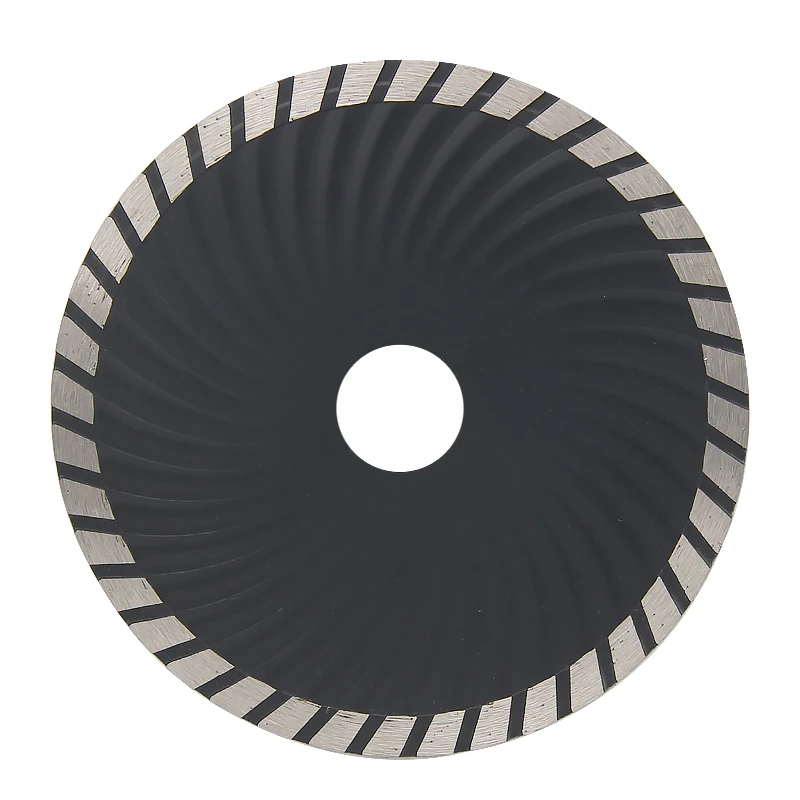
Can You Put a Diamond Blade on a Chop Saw? Complete Guide
Can You Put a Diamond Blade on a Chop Saw? Complete Guide
Ever watched sparks fly off an abrasive wheel and thought, “There’s gotta be a better way”? You’re not alone. The standard disc that ships with most chop saws gets the job done, but it burns through fast, launches sparks in every direction, and chokes on harder materials. So can you swap in a diamond blade and get cleaner, faster cuts? Yes—but only if you verify a few critical specs first. Here’s exactly what you need to know about running a diamond blade on a miter saw or chop saw, from safety to blade types to which materials actually benefit.
1. Abrasive Wheel vs Diamond Blade: Core Pros and Cons
The abrasive wheel is a consumable. It wears. It degrades. And if you’re cutting rebar or thick steel plate, you’ll go through several in an afternoon. Diamond blades, by contrast, are engineered for longevity. They’re the go-to for masonry, tile, and concrete work, and they hold up far longer than any abrasive disc.
But here’s the catch. You can’t just bolt one on and go.
2. Mandatory Pre-Check Specs for Diamond Blade Installation
2.1 RPM Rating: The Most Critical Safety Factor
RPM rating matters more than anything. Most chop saws spin between 3,450 and 4,000 RPM. Diamond blades are rated for specific maximum speeds, and exceeding that rating is how blades shatter. Check the blade’s printed RPM limit against your saw’s no-load speed before you even think about mounting it. This isn’t optional.
Wet vs. dry is another consideration. Some diamond blades require water cooling. Others are designed for dry cutting. On a chop saw, you’re almost certainly running dry, so pick a blade that’s explicitly rated for that. Dry blades have cooling slots or holes to dissipate heat. Running a wet blade dry overheats it and ruins the segment bond.
3. Core Answer: Can You Put a Diamond Blade on a Chop Saw?
Definite Answer: YES — You can install and run a diamond blade on a standard chop saw safely and effectively, as long as all key specifications match your saw and cutting materials.
What can you actually cut? Concrete, brick, block, stone, and tile are the obvious ones. With the right blade, you can also cut cast iron, steel, and other ferrous metals. The cuts are cleaner than abrasive wheels, with less burr and less heat buildup. And you’ll get dramatically less spark spray—a nice bonus if you’re working in a tight space.
So, can you put a diamond blade on a chop saw? Absolutely, provided the RPM rating matches, the arbor fits, and you’ve got the right blade for the material. Do that, and you’ll wonder why you ever put up with those sparks in the first place.
4. Diamond Blade vs Abrasive Wheel: Cost & Performance Tradeoffs
But there’s a tradeoff. Diamond blades cost more upfront. A quality one runs anywhere from $30 to $100 or more, depending on size and spec. Abrasive discs are a few bucks each. The math works out over time if you’re doing regular cutting, but for a one-off project, an abrasive wheel might be the smarter buy.
5. Non-Negotiable Safety Rules for Chop Saw Diamond Blade Use
Safety still rules. Diamond blades don’t eliminate the risks. You’re spinning a steel disc at thousands of RPM, and if it binds or shatters, the consequences are serious. Wear eye protection. Use a face shield. Keep your hands clear. Make sure the blade guard is in place and functional. And never force the cut—let the blade do the work.
One more thing. Check your saw’s manual before making the switch. Some manufacturers void warranties if you use non-standard blades. Others specifically list diamond blades as acceptable. Knowing where you stand before you cut saves headaches later.
6. Why Matching Saw and Blade Specs Is Indispensable
Before you drop cash on a new blade, you have to know what your saw can actually handle. A chop saw isn’t complicated. A motor spins a blade at a fixed speed, you pull it down onto the workpiece, and that’s it. The real magic happens when that blade matches the job at hand. Slap the wrong one on, and you’re looking at ragged cuts, a busted motor, or worse—a trip to the ER. Not worth it.
The arbor is the shaft the blade mounts on. Most chop saws use a 5/8-inch or 1-inch arbor, but that’s not a universal rule. You’ll want to check your saw’s manual, or just measure the arbor directly—actually, measuring is faster. A diamond blade has to match that arbor size exactly, or you’ll be reaching for a reducing ring. Those rings are cheap and easy to find. But never, ever force a blade onto an arbor that doesn’t fit. A wobbly blade? That’s a disaster waiting to happen.
7. RPM Rating for Chop Saw: Why Speed Matters
Here’s where most people mess up. A diamond blade spins at a certain maximum RPM, and your chop saw spins at a fixed speed. If the blade’s max RPM is lower than your saw’s speed, the blade can shatter. It’s not a maybe; it’s a definite risk. Most 10-inch chop saws run around 3,800 to 4,500 RPM. A 12-inch saw might run slower. Always check the RPM rating on the blade and compare it to your saw’s no-load speed. If the blade says 4,000 RPM max and your saw runs at 4,500, do not use it.
8. Abrasive Chop Saw vs Diamond Blade: The Core Differences
So you’re trying to figure out whether a diamond blade is actually worth the switch. Fair question. But before you commit, you need to understand exactly what you’re trading away — and what you’re getting in return. These two tools aren’t just different versions of the same thing. They’re fundamentally different beasts.
Abrasive wheels grind their way through metal using friction and sheer force. They wear down as they cut, shedding grit and getting smaller with every pass. Diamond blades, on the other hand, don’t grind. They slice. The diamond segments on the rim actually cut through the material rather than rubbing it away. That distinction changes everything about how they perform, how long they last, and what they cost you in the long run.
Here’s the thing about abrasive wheels: they’re cheap upfront. You can grab one for a few bucks and slap it on your chop saw without thinking twice. But they burn through themselves pretty quickly, especially on thick stock. You’ll find yourself replacing them more often than you’d like. And the heat they generate? That’s a real problem. Friction creates heat, and heat ruins the temper of your metal. If you’re cutting hardened steel or doing precision work, that’s a dealbreaker.
Diamond blades flip the script. The initial cost is steeper — sometimes five to ten times what you’d pay for an abrasive wheel. But they last substantially longer. We’re talking dozens of cuts versus hundreds, depending on what you’re cutting. They run cooler, too. Since they’re actually cutting instead of grinding, there’s less friction and less heat transfer to your workpiece. Your metal stays cooler, which means the structural integrity stays intact.
You’ll also notice the cut quality. Diamond blades leave a cleaner edge. Less burring, less distortion, less cleanup afterward. If you’re cutting thin-walled tubing or sheet metal, that difference becomes pretty obvious pretty fast. Abrasive wheels tend to leave a rougher edge and can warp thin material from the heat.
Now, the downsides. Diamond blades are pickier about what they’ll cut. They’re not ideal for everything — cutting certain ferrous metals can be tough on them, and they don’t like being used for general-purpose grinding the way abrasive wheels do. Plus, if you’re doing demolition work where blades take a beating, you might not want to risk a pricey diamond blade on something that could get knocked around.
The other practical consideration: your saw. Not every chop saw can handle a diamond blade. You need the right arbor size, the right RPM rating, and enough power to keep the blade spinning at the speed it needs. Check your saw’s specs before you invest. Otherwise you’re stuck with a blade you can’t use.
So which one makes sense for you? If you’re a hobbyist doing occasional cuts on mild steel, an abrasive wheel probably serves you fine. They’re cheap, they work, and you’re not cutting enough volume for the replacement costs to hurt. But if you’re fabricating professionally, cutting all day, or working with hardened materials — the diamond blade pays for itself. The longer life, the cleaner cuts, the reduced heat. It adds up.
A lot of guys end up owning both. Keep an abrasive wheel for rough work and quick cuts, and swap in the diamond blade when you need something precise. That’s not a bad approach, honestly. You get the best of both worlds without compromising on either end.
9. How Abrasive Wheels Work (and Their Limitations)
Abrasive wheels aren’t fancy. They’re just aluminum oxide or similar grit, held together by bonding agents. The whole thing works on friction. The wheel literally grinds material off the workpiece, bit by tiny bit. That’s it. No laser precision, no magic.
But here’s the trade-off. That friction generates serious heat, plus a constant shower of sparks you’ll be cleaning up for hours. And the wheel itself? It gets eaten away in the process, especially if you’re working with hard steel. So you’re swapping the wheel more often than you’d like. The cut is slow, too. Forget a clean slice—you’re usually left with a rough edge that needs deburring before you can call it done.
One more headache: as the abrasive wheel wears down, its diameter shrinks. That changes your cutting depth mid-job. You set the tool once, and by the third pass, it’s cutting shallower than you planned. Annoying.
10. What Makes a Diamond Blade Different
A diamond blade doesn’t grind. It cuts.
The edge is packed with industrial diamond particles that fracture the material as they pass through. No sparks flying everywhere, the cut runs cooler, and it moves faster than you’d expect. Here’s a detail people miss: the blade keeps its full diameter for its entire lifespan. That means your cutting depth doesn’t drift over time, which abrasive wheels can’t promise.
The trade-off? You’ll pay more upfront. No way around that.
But if you’re chewing through hard materials on a regular basis, a diamond blade outlasts any abrasive wheel by a wide margin. The math works out in your favor eventually, even with the higher sticker price.
11. Can You Use a Diamond Blade for Cutting Metal?
This is the most common question, and the answer is nuanced. Yes, you can use a diamond blade for cutting metal, but not every diamond blade is suitable.
Here’s the thing—most blades you’ll find at the hardware store are built for masonry or tile. Those won’t do much against steel except wear themselves out fast. But there are specific diamond blades designed with metal in mind, and they’re becoming more common.
The key difference comes down to the bond. A blade meant for concrete uses a softer bond that wears away to expose fresh diamonds. For metal, you need a harder bond, because metal is abrasive in a different way. It’s not about cutting through the material as much as it is about grinding it away at a controlled rate.
You’ll also want to think about the type of metal. Thin sheet metal? That’s one thing. Thick rebar or structural steel? That’s another. A diamond blade can handle both, but your technique has to change. Faster speeds and lighter pressure work better on thinner stuff. Heavy, slow passes are what you need for thicker sections.
Now, there’s a catch. Diamond blades generate serious heat when cutting metal. You’ll want a wet cut if at all possible, or at least be prepared to stop and let things cool down. Nobody wants to ruin a good blade because they got impatient.
And one more thing—check your saw’s RPM rating against the blade’s maximum. That’s not optional. Mismatched speeds can cause the blade to shatter, and that’s a trip to the ER you don’t want to make.
So yeah, it works. But it’s not a one-size-fits-all deal. Match the blade to the job, keep an eye on heat, and you’ll be fine.
12. Steel Cutting Diamond Blade: What to Look For
Cutting steel? You can’t just grab any blade off the shelf. Steel is a ferrous metal, and it fights back with heat and hardness. So you need something purpose-built for it. These blades come with a different bond, one that actually holds up when things get hot. Don’t skip this part. Look for a “steel cutting diamond blade” on the packaging, or any label that says it’s meant for ferrous materials. That’s your green light.
Here’s the thing—a standard masonry blade? Forget it. It’ll wear out before you finish your first cut. Worse, it could shatter. That’s a safety hazard you don’t want to mess with. If you’re cutting metal with a diamond blade, pay attention to the rim too. You’ll want a continuous rim or a fine-segmented one. Why? Smoother cuts, less vibration, and a cleaner finish. It makes a real difference when you’re working with steel.
Cutting metal throws off heat, and heat wrecks blades and workpieces alike. Plenty of steel-cutting diamond blades are rated for dry use—they carry a special bond formulated to shed heat as you go. But here’s the thing: if your cuts are long and continuous, you’ll want to give the blade a breather between passes. Let it spin free for a few seconds, or just stop and wait.
Some blades are built for wet cutting, sure. But you can’t just run water on a standard chop saw without rigging it up, and that’s usually a bad idea. Don’t do it.
So stick with dry-cut diamond models that match your saw’s speed rating. That’s the safe play.
13. Cutting Concrete and Masonry with a Chop Saw
If you’re a contractor or a serious DIYer, you might wonder if your chop saw can handle masonry. The answer is a qualified yes, with the right blade and a lot of caution.
Here’s the thing: a standard abrasive blade meant for steel will shred itself against concrete. You need a diamond-tipped blade, and not just any one — it’s got to be rated for dry cutting. The RPM rating matters too. Your saw spins fast, and a blade that isn’t rated for that speed can shatter. That’s not a mess you want to deal with.
So what’s the actual technique? You don’t just push straight through. Let the blade do the work. Keep a firm grip, steady pressure, and let the saw find its pace. If you force it, you’ll overheat the blade and burn out the motor. And that’s a repair bill nobody wants.
You’ll also want to think about dust. Cutting concrete produces a ridiculous amount of it — fine particles that get everywhere, including your lungs. A respirator isn’t optional here. Neither are safety glasses. And ear protection, because that cut is loud. Trust me on that one.
One more thing: score the line first. A shallow pass gives you a guide to follow, and it keeps the blade from wandering on the second, deeper cut. It takes an extra minute but saves you from a crooked mess.
Can you do it? Sure. Just respect the tool, respect the material, and don’t rush. That’s the whole secret.
14. Choosing the Right Masonry Cutting Disc
Concrete, brick, stone—if that’s what you’re cutting, you need a masonry disc. Not just any blade. These things use a softer bond, so fresh diamonds keep getting exposed as the wheel wears down. That’s the whole trick. Abrasive materials will chew up a steel blade in no time; it’ll glaze over and quit on you completely. The segments on a masonry blade? They’re taller and wider, built to shrug off all that dust.
15. Managing Dust and Debris
Cutting concrete with a chop saw? You’re about to make a colossal mess. That dust isn’t just annoying to clean up, it’s genuinely hazardous. Silica dust wreaks havoc on your lungs, and inhaling it is no joke. You absolutely need a dust extraction system or a proper respirator. A shop vac with a HEPA filter helps some folks, but honestly, it might miss the fine stuff. Cutting masonry inside? Then you’d better have a containment plan ready. A diamond blade on a miter saw for concrete does work, but it’s filthy, loud work. You’ll want every piece of PPE you own.
16. Full Chop Saw Blade Types Comparison
Diamond blades get all the attention. But they’re far from your only choice.
If you really want to pick the right blade for your chop saw, you’ve got to look at the whole lineup. Each type brings something different to the table, and knowing what that is can save you from buying the wrong tool for the job.
Here’s a breakdown of the main players.
Abrasive blades are the old workhorses. They’re made of a bonded abrasive, usually aluminum oxide or silicon carbide, pressed into a disc. They’re cheap, they’re everywhere, and they’ll chew through metal, masonry, and tile without blinking. The downside? They wear down fast, they throw sparks everywhere, and the cuts they leave behind are rough. You wouldn’t use one for fine woodworking.
Carbide-tipped blades are the upgrade. Think of them as a circular saw blade on steroids. The teeth are made of carbide, which stays sharp far longer than steel. These are your go-to for cutting wood, aluminum, and even some softer metals. You’ll get a cleaner cut and a blade that lasts, but you’ll pay more upfront. And you’ve got to be careful—they’re not for hitting nails or rebar.
Steel blades are the budget pick. They’re basically a solid disc of high-speed steel with teeth ground into them. They work, but they dull quickly, especially on anything harder than soft wood. If you’re doing a one-off project and don’t want to spend much, they’ll get you through. Just don’t expect them to last.
Tungsten carbide-tipped (TCT) blades are a specific type of carbide blade, but they deserve their own mention. The teeth are brazed onto the body, and they’re engineered for serious, repeated use. If you’re cutting steel all day, this is the blade you want. They hold an edge incredibly well and can handle the heat and friction of heavy-duty work.
Diamond blades—which you already know about—round out the list. They’re for the hardest materials: concrete, brick, stone, and tile. The cutting edge is embedded with industrial diamond grit, so they’ll cut through almost anything except metal. They don’t have teeth, they grind.
So, what’s the takeaway? Match the blade to the material. Abrasive for rough, dirty cuts on metal. Carbide for clean cuts in wood and aluminum. TCT for serious metal work. Steel if you’re broke and in a hurry. And diamond when nothing else will touch the material.
It’s not complicated. It just takes a little thought before you pull the trigger.
17. Aluminum Oxide Blade vs Diamond: A Direct Comparison
Aluminum oxide blades are the standard abrasive wheels. They’re cheap, sure, and they’ll get the job done on steel. But here’s the catch: they burn through fast. Diamond blades? Way pricier upfront, but they last ages and cut quicker to boot. For a pro running a saw every day, the diamond option wins out almost every time—it’s just math. But for the weekend warrior doing a handful of cuts a year? The abrasive wheel might be all you need. That’s the real takeaway: it’s a cost-per-cut deal, not just what’s cheaper at the register.
18. Other Specialty Blades for Metal and Wood
Cutting non-ferrous metals like aluminum? You’ve got other routes. A carbide-tipped blade with a high tooth count absolutely nails it on aluminum—clean cuts, less chatter. Wood’s a different story. You can technically throw a wood-cutting blade on a chop saw, but watch the RPM rating like a hawk. Most chop saws spin way too fast for standard wood blades, and that’s a recipe for disaster. So if you’re hunting for metal chop saw accessories, skip the generic stuff. Grab a carbide blade built for non-ferrous metals or a specialized steel-cutting one. Honestly, the right blade for the material? That’s the whole ballgame.
19. Safety Considerations When Using a Diamond Blade
Safety is non-negotiable. A diamond blade spinning at thousands of RPM is a powerful tool, and it demands respect.
That’s not dramatic flair—it’s physics. You’re dealing with a disc of steel and industrial grit moving fast enough to slice through reinforced concrete like it’s butter. One lapse in judgment, one moment of carelessness, and you’re looking at a trip to the emergency room. Or worse.
So let’s talk about what actually matters before you fire that saw up.
First, check your blade. Every single time. Look for cracks, missing segments, or a warped arbor hole. A blade that’s been dropped even once could have internal damage you can’t see with the naked eye. If something looks off, it probably is. Don’t risk it.
Second, match the blade to the material. This sounds obvious, but you’d be shocked how many people grab whatever blade is closest and hope for the best. A blade designed for masonry isn’t going to handle steel. And a steel blade on concrete? That’s how you get sparks flying everywhere and a blade that’s ruined in minutes. Check the specs. Know what you’re cutting.
Third, think about your machine. The blade’s rated RPM needs to meet or exceed what your saw actually spins at. If you’re using a grinder that hits 12,000 RPM but your blade is only rated for 8,000? That’s a disaster waiting to happen. The blade can literally fly apart. And when a diamond blade comes apart at speed, the fragments don’t just fall to the ground—they become projectiles.
Now, the stuff people tend to overlook.
Wear the right gear. Safety glasses aren’t optional. Neither are hearing protection, because the noise from a diamond blade on concrete can hit 100 decibels or more. That’s enough to cause permanent hearing damage in under fifteen minutes. Steel-toed boots, gloves, and a dust mask (or better yet, a respirator if you’re cutting something like silica-heavy materials) should all be part of your standard setup.
Also, think about where you’re cutting. Is there water nearby? If you’re doing wet cutting, that changes the equation—you need to make sure the blade is designed for wet use. Some aren’t, and using a dry blade wet can cause it to break down prematurely. Conversely, using a wet blade dry will overheat it and ruin the bond.
And here’s something a lot of people skip: let the blade do the work. Don’t force it. If you’re pushing hard, something’s wrong. The blade should be cutting at its own pace, not being bullied through the material. Forcing it creates friction, friction creates heat, and heat destroys the bond that holds the diamond segments in place. That’s how blades crack.
Another thing—check your cutting direction. Diamond blades are directional. There’s an arrow on the blade indicating the proper rotation. Install it wrong and you’ll not only ruin the blade, you’ll make the cut dangerously unstable.
So before you pull that trigger, run through the checklist. Blade integrity. Material match. RPM rating. Safety gear. Cutting environment. Direction. It takes thirty seconds, and it could save you a hand, your hearing, or your life.
Because here’s the thing—every year, thousands of people end up in emergency rooms with angle grinder injuries. Most of them thought they knew what they were doing. Don’t be one of them.
20. The Safety Guard for Chop Saw: Keep It On
Never remove the safety guard for chop saw. Just don’t.
That guard isn’t there for decoration. It’s your shield against sparks, flying debris, and—if things really go sideways—blade fragments that could turn a routine cut into a trip to the ER. Sure, some guys yank it off because it blocks their view of the cut line. But that’s a terrible trade-off, and here’s why: you’re swapping a clear sightline for your fingers, your face, or worse. If you can’t see the cut, don’t gut the guard. Fix the problem instead. Move the workpiece, reposition yourself, or clamp on a brighter work light. There’s always a workaround that doesn’t involve removing the one thing standing between you and a catastrophic injury.
The guard is your first line of defense. Keep it on. Every single time.
21. Replacing Abrasive Wheel with Diamond: Installation Tips
Swapping out an abrasive wheel for a diamond blade? The steps are basically identical. Unplug the saw first—don’t skip that. Lock the spindle down, then get the arbor nut off. Set the diamond blade on the arbor and check that it’s sitting flush; if it’s even slightly off, you’ll feel it when you cut. Put the outer flange back on and tighten the nut to whatever torque the manufacturer specifies. Over-tightening is a real problem. It can warp the blade, and a warped blade is dangerous. Before you fire the saw up, give the blade a spin by hand. If it wobbles, something’s not seated right. Fix it then, not mid-cut.
22. PPE and Work Area Setup
You need eye protection. Safety glasses or a face shield. Hearing protection isn’t optional—diamond blades scream, and the damage is permanent. Gloves? Sure, but keep them snug. Loose fabric near a spinning blade is how you lose a finger. Clamp your workpiece down. Vise, C-clamp, whatever works. Never, ever hold it by hand mid-cut. That’s a trip to the ER waiting to happen.
Keep your space clean and bright. Shadows hide problems. If metal’s on the menu, expect sparks. Hot little shards that’ll happily ignite sawdust or oily rags. Have an extinguisher within arm’s reach. You won’t regret it.
23. Frequently Asked Questions
23.1 Can You Install a Diamond Blade on a Standard Chop Saw?
Absolutely, a diamond blade will work on a standard chop saw. The catch is that the blade’s arbor hole and its max RPM have to line up with what your saw can handle. So before you bolt anything on, flip through the saw’s manual and check the specs printed right on the blade’s packaging.
Getting this wrong is a recipe for disaster. A blade spinning too fast can shatter, and an arbor that doesn’t fit right will wobble—neither is a good time. But if the numbers match, you’re good to go. It’s really that simple.
23.2 What Is the Best Blade for Chop Saw?
There’s no single “best” blade, honestly. It all depends on what you’re cutting.
For steel, you’ve got two solid routes. A steel cutting diamond blade will chew through it, or a carbide-tipped blade gets the job done with a clean edge. Aluminum is a different animal though. You want a carbide blade with a high tooth count for that—fewer teeth will just grab and bind. And if you’re just doing general shop work? Don’t overthink it. A good abrasive wheel is still the workhorse. It wears out faster, sure, but it’s cheap and it cuts just about anything.
23.3 Can a Chop Saw Cut Concrete?
Yeah, it can. You just need a masonry cutting disc or a diamond blade built for the job. Slap one of those on, and the saw will chew through concrete without much fuss.
But here’s the thing you should know before you start: this thing kicks up an insane amount of dust. We’re talking a thick cloud that’ll coat your whole garage in a fine gray powder. So you’ll want to grab a proper respirator—not just a dust mask—because that silica dust is nasty stuff to breathe in. And honestly? You might want to do it outside if you can.
23.4 How Long Does a Diamond Blade Last on a Chop Saw?
Honestly? A diamond blade will run circles around an abrasive wheel. We’re talking 50 to 100 times longer, sometimes even more, depending on what you’re cutting and how hard you push it. But that range is a trap—it hides the real story.
Cut steel rebar all day and you might get hundreds of cuts out of one blade. That’s impressive. Switch to concrete, though, and the wear comes at you fast. The abrasive aggregate just chews the bond up. So the honest answer? It’s all about the material.
23.5 Do I Need a Special Blade for Cutting Aluminum?
You really do. Aluminum is soft and gummy, so it’ll clog up a standard abrasive wheel in no time flat. That’s a mess you don’t want to deal with. The go-to choice here is a carbide-tipped blade with a negative rake angle. It cuts through the metal cleanly without grabbing or binding. Some diamond blades are built for non-ferrous metals too, so those work as well if you’ve got one lying around.
24. Conclusion
Slapping a diamond blade on your chop saw? That’s a solid move. But it’s not some universal fix-all. First thing you need to check: the arbor size. Then the RPM rating. Skip that and you’re asking for trouble.
The blade itself has to match the material. Steel? You’ll want a diamond blade built for ferrous metals. Concrete? Grab a masonry cutting disc. Aluminum? That’s carbide territory. Get the wrong one and you’ll burn through it in no time.
The payoff is real. Faster cuts, way fewer sparks flying around, and the blade just keeps going long after an abrasive wheel would’ve given up. That’s the honest truth.
But here’s the thing—don’t get lazy. Keep the safety guard on. Wear your PPE. Give the equipment a once-over before you fire it up. It takes thirty seconds.
Get the setup right, and your chop saw turns into something way more useful than it was before. More versatile. More efficient. You’ll wonder why you didn’t do it sooner.
Now you know exactly what to look for. So make the call, grab the right blade, and get back to work. Your project isn’t going to finish itself.