-
Blake.Chu sales consultant
-
Email: 113217160@qq.com
-
Phone/WeChat +86 19129108136
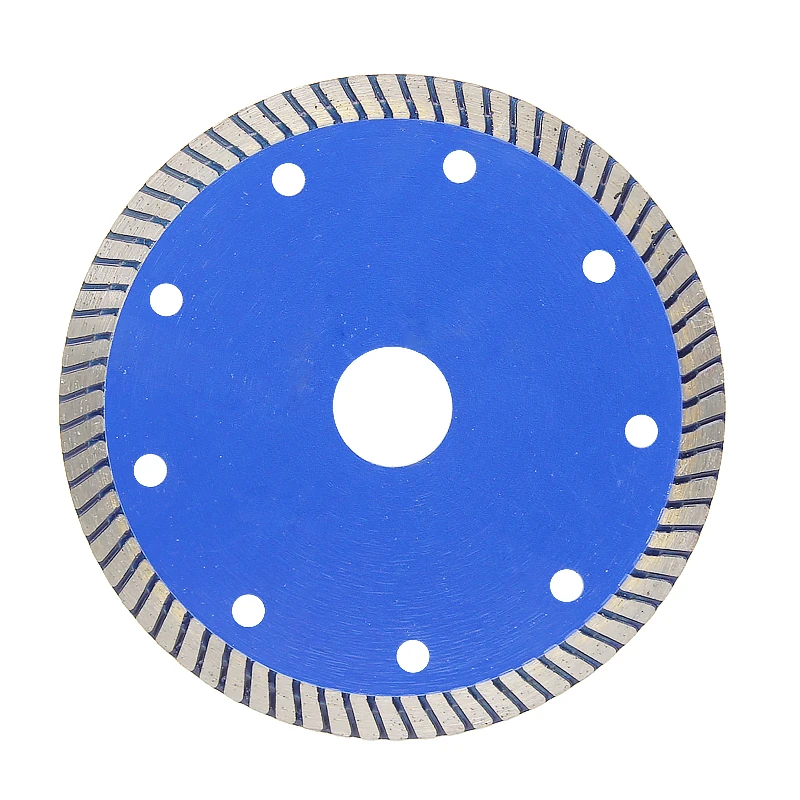
Can You Put a Diamond Blade on a Miter Saw Safely?
Diamond blades on miter saws sound like a shortcut to disaster. A spinning abrasive disc at 4,000 RPM can shatter if it’s not rated for the speed, and the dust from cutting concrete will ruin a saw’s motor bearings in short order. But the short answer is yes, you can put a diamond blade on a miter saw safely, provided you match the blade’s RPM rating to your saw’s speed, use the right blade type for the material, and protect the tool from fine dust. This guide walks through the compatibility checks, the blade options, and the safety steps that keep your fingers and your saw intact.
Let’s be honest about the risks first. That blade spins fast. Really fast. If you grab any old diamond disc off the shelf and slap it on, you’re gambling with your face.
Here’s what you actually need to check before you even think about making a cut.
RPM rating. Look at the blade’s printed specs. A 10-inch miter saw typically runs around 5,000 RPM. Your diamond blade needs to be rated for at least that speed. Most quality blades from brands like DeWalt, Makita, or Diablo handle 6,000+ RPM. Cheap ones might not. That mismatch is how blades come apart.
Blade type. Not all diamond blades are the same. You’ve got segmented blades for fast cutting through concrete and brick. Continuous rim blades for tile and stone. Turbo blades that sit somewhere in between. Match the blade to what you’re cutting. A masonry blade on porcelain tile will chatter and chip. A tile blade on concrete will wear out in minutes.
Dust protection. This is the one people skip and regret later. Concrete dust is fine. Like talcum powder fine. It gets everywhere. Into the arbor. Into the bearings. Into the motor windings. That dust acts like sandpaper on moving parts. You’ll hear the bearings grinding within a month.
So what does a safe setup actually look like?
You need a dust collection system. A shop vac hooked directly to the saw’s dust port works, but you’ll want a separator so the fine particles don’t kill the vac too. Wear a respirator, not just a dust mask. The stuff that gets through is bad for your lungs. And plan to clean the saw thoroughly after each session. Blow out the motor housing. Wipe down the arbor. Pull the blade and inspect it for cracks.
Here’s a trick the pros use. Wet cutting. If you can rig up a water drip onto the blade, it knocks down the dust almost completely and keeps the blade cooler. Some guys use a spray bottle. It’s messy but it works. Just be careful with water near electricity. That’s a whole different kind of danger.
One more thing. Your saw’s brake. If your miter saw has an electric brake, it stops the blade in seconds. That’s fine with a diamond blade. The sudden stop doesn’t hurt anything. But if you hear any vibration or wobble during spin-down, stop and check the arbor. A blade that’s not seated perfectly will wobble at speed and that’s how teeth end up embedded in the wall.
So yes, it can be done safely. The people who say otherwise probably tried it with the wrong blade and no dust protection. They blamed the setup instead of their shortcuts.
Check your speeds. Pick the right blade. Control the dust. That’s the whole formula.
Understanding Diamond Blade Compatibility with Miter Saws
Here’s the thing about miter saws. They’re wood tools. The blade spins somewhere between 3,000 and 5,000 RPM, and that speed range works great for cutting trim and framing lumber. But masonry? Different animal entirely.
You might look at a diamond blade sitting in your garage, pulled off an angle grinder, and think it’ll work. Those grinders scream along at 10,000+ RPM, so surely a miter saw running slower would be fine, right?
Wrong.
Two things kill that idea before you even get the blade out of the box. The arbor hole, first. Miter saws typically take a 1-inch arbor, while angle grinders run 7/8-inch or 20mm. That gap means the blade won’t seat properly. Ever.
Then there’s the speed rating stamped right on the blade itself. That number isn’t a suggestion. A blade rated for 10,000 RPM might technically handle the miter saw’s lower speed, but the reverse situation gets dangerous fast. A blade not rated for the tool’s speed can shatter.
So what happens when people force it? They use reducer rings to adapt the arbor, which introduces wobble. They mount the blade backward because it fits better that way, which means the diamond segments cut on the wrong edge. The tool groans, the cut wanders, and the blade wears out in about three uses.
The honest answer is that you need a diamond blade specifically built for miter saws. They exist. Manufacturers like DEWALT and Diablo make them with the right arbor size and the correct RPM rating for the tool. That’s the setup that actually works.
Miter Saw Arbor Size and Blade Fit
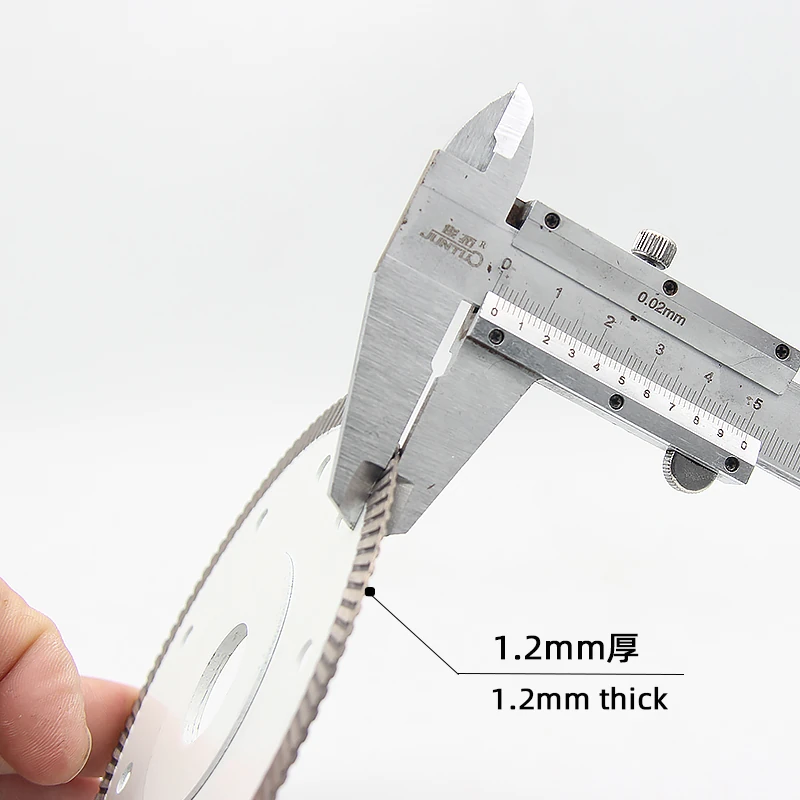
The arbor is the shaft that holds the blade. Plain and simple. Most miter saws run a 5/8-inch arbor, though some of the bigger sliding compound models step up to 1 inch. Before you buy anything, check your saw’s manual—or better yet, grab a caliper and measure the shaft yourself. It takes thirty seconds and saves you a headache. Diamond blades made for tile saws are a different story entirely; they often come with a 7/8-inch or 1-inch arbor, which means you’ll need a reducing ring or a bushing kit to get them seated properly.
Here’s the thing about a bad fit. If the blade wobbles on the arbor, you’re inviting vibration, ragged cuts, and kickback that can genuinely hurt you. Don’t ever force a blade onto the shaft. If it won’t slide on smoothly, the hole is wrong. Full stop.
RPM Rating and Saw Speed Settings
Every diamond blade carries a maximum operating speed right on the label, usually in RPM. That number isn’t a suggestion. Your miter saw’s no-load speed has to sit below it, or you’re asking for trouble.
Take a 10-inch diamond blade rated for 6,000 RPM. On a saw spinning 4,500 RPM, it’s perfectly fine. But here’s where guys mess up: a 7-inch blade rated for 8,000 RPM slapped onto a 10-inch saw. The blade’s too small, the arbor’s probably wrong, and that speed mismatch turns into a real hazard. You might get away with it for a while. Then you won’t.
Some miter saws let you dial in adjustable speed settings, which solves the problem outright. If yours doesn’t have that feature, you’re stuck choosing blades rated for at least the saw’s maximum RPM. Check the manual if you’re unsure. The sticker on the blade tells you the limit; the saw tells you what it spins. Match them up.
That’s the whole trick. Speed rating math, nothing more.
Dry Cutting vs. Wet Cutting Diamond Blades
Diamond blades basically split into two camps: wet and dry. Wet blades need a steady water supply to cool the rim and wash away the debris. Dry blades rely on air-cooled segments with slots or gullets that pull air across the cutting edge. Simple enough, right?
Here’s where people get into trouble. Run a wet blade without water and the steel core overheats, warps, and throws the blade out of balance. That’s a ruined blade and potentially a dangerous one. On the flip side, feeding water to a dry blade won’t hurt you, but it’s pointless. It just rusts the core over time.
So the real question isn’t which is better. It’s which one matches your setup. Got a wet saw on site? Go wet. Working with a handheld grinder and no hose nearby? Dry is your only real option. Just don’t mix them up.
Segmented Rim Blade for Dry Cutting
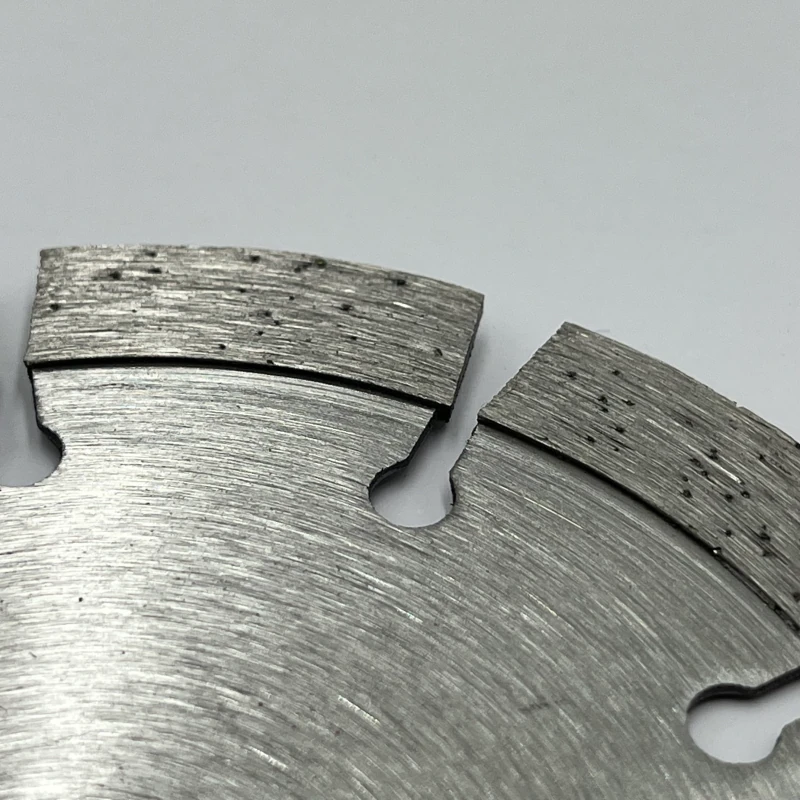
A segmented rim blade looks like a saw blade with a serious attitude. Those little gaps between the diamond segments aren’t just for show. They pull air through the cut, which keeps the blade from overheating when you’re running it dry. That’s the whole trick behind dry cutting, honestly.
The trade-off? Speed and toughness. Segmented blades chew through material fast, and they don’t flinch when you hit rebar or hard aggregates buried in the concrete. But you pay for that aggression in the finish. The edge comes out rougher than what a continuous rim blade would leave behind.
So where does this thing actually shine? Brick. Pavers. Concrete on a miter saw. Short, shallow passes are the name of the game here. And here’s the catch you need to know about before you start: the blade guard on a miter saw sits right over most of the blade. That guard limits how deep you can cut. Full-depth masonry cuts? Not happening. You’re working within whatever the guard allows, and that’s just the reality of the setup.
Pick your battles. Segmented rim blades win the fast-cutting fight every time, but they’re not the tool for precision work.
Continuous Rim Blade for Tile and Stone
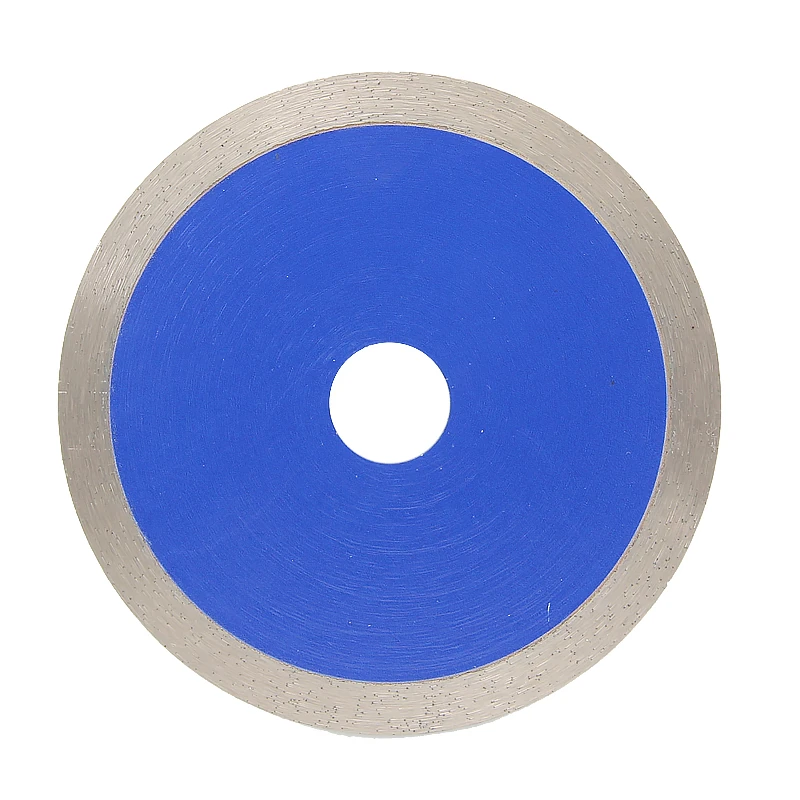
A continuous rim blade has a smooth, solid edge. No gaps, no interruptions. That’s the whole point.
It cuts slower than a segmented blade, sure, but the payoff is a clean, chip-free finish. That’s why it’s the go-to for porcelain and ceramic tile. You won’t see ragged edges or busted corners. Not with this blade.
On a miter saw, though? It works, technically. But the saw’s table and fence weren’t built to hold tile the way they hold wood. You’ll be fighting the setup the whole time. You need a stable platform underneath, and you need to feed the tile through slowly, carefully, without forcing it. The blade guard makes things worse. It sits right in your line of sight, so you’re basically cutting blind, hoping the line you marked is actually where the blade is landing.
Here’s the thing. If you cut tile regularly, a tile cutting miter saw is the better buy. It’s purpose-built for this. Water tray, sliding table, the works. You get visibility, support, and a cleaner cut. A regular miter saw is a workaround. The specialized tool is the actual solution.
Choosing the Right Diamond Blade for Your Material
The material you’re cutting dictates the blade bond, the segment height, and the rim style. A masonry blade for concrete is different from a blade for metal or tile. Using the wrong one burns out the diamonds or shatters the core.
Here’s the thing: each material demands its own specific setup. Concrete wants a soft bond so the diamonds keep exposing fresh edges. Harder stuff like granite? You’ll need something tougher that won’t break down mid-cut. Tile calls for a continuous rim. Metal wants a different segment height entirely.
Get this wrong and you’re not just wasting money. The blade can warp. It can crack. You might even end up with steel fragments flying across the jobsite.
That’s why matching the blade to the material matters more than picking the most expensive option on the shelf. The cheap blade with the right bond will outperform the premium one with the wrong specs every single time.
So before you start cutting, ask yourself what you’re actually cutting. The answer determines everything downstream.
Picking the right blade comes down to a simple trade-off. A hard bond holds its diamonds longer, which makes it the sensible choice for tough materials like concrete and granite. Soft bond? That one sheds its grit faster. You want that for brick, asphalt, and other softer stuff.
For a miter saw, you’re locked into a 10-inch blade with a 5/8-inch arbor. And don’t forget the RPM rating—it needs to clear your saw’s max speed, or you’re asking for trouble.
Here’s the messy part nobody mentions. Cutting concrete dry on a miter saw throws off a shocking amount of silica dust. That fine powder finds its way into the motor, coats the slide rails, and gums up the blade guard mechanism. It’s relentless. You’ll want a dust collection setup or a shop vac hooked straight to the saw’s port. And please, wear an N95 mask. Minimum.
Diamond blades for metal cutting do exist. But you won’t find them sitting on most miter saws.
The problem comes down to heat.
Run a diamond blade through steel and the friction builds fast. That heat doesn’t just threaten the blade’s bond, it can cook the saw’s motor too. So why risk it? A carbide-tipped blade handles aluminum, copper, and steel far better on a miter saw. Carbide teeth slice through cleanly at lower speeds, and the kerf stays narrow, which means less wasted material and less strain on the motor. That’s a win on both ends.
If you’re dead set on a diamond blade for metal anyway, pick a segmented rim model rated for high RPM. And take your time with slow, steady passes. That’s the only way it’ll hold up.
An abrasive blade is basically a thin fiberglass disc with grit embedded right into it. That’s the classic route for chopping metal on a miter saw. It’s cheap. It cuts fast. And when it’s gone, you just toss it.
But here’s the catch. Those discs shed material quickly, throw sparks everywhere, and often leave a rough burr along the cut edge. A carbide-tipped blade flips that script. You’ll pay more upfront, no question, but it holds its edge far longer and leaves a noticeably cleaner finish. For the occasional weekend project, the abrasive disc gets the job done without breaking the bank. If you’re cutting metal on a regular basis though, a carbide-tipped blade with a negative hook angle is the safer, more efficient call.
Safety Precautions for Using Diamond Blades on Miter Saws
That blade guard isn’t just decoration. It’s the only thing standing between your fingers and a spinning disc of abrasive grit. Sure, taking it off gives you a cleaner sightline and maybe a slightly deeper cut, but that’s a trade nobody should make.
Here’s the thing about diamond blades: they’re brittle. Tougher than steel, yes, but they don’t bend when something goes wrong. They shatter.
A sudden catch in the wood, a knot that grabs, a piece of material shifting mid-cut, and the blade can kick back with enough force to throw the saw off the bench or send fragments flying. People have lost fingers this way. Not because they were careless, but because they assumed the guard was just in the way.
The guard slows you down a little. That’s its job. It also keeps your hands exactly where they belong, which is nowhere near the blade’s path. You’ll never miss those milliseconds of visibility when you’re counting your fingers afterward.
So keep the guard on. Adjust your technique, not the safety equipment. That’s the whole secret.
Removing the blade guard means that spinning disc is fully exposed. If that diamond blade happens to catch a piece of rebar, the tool can kick the workpiece straight back at you. Or crack the blade itself. Honestly, that’s a bad spot to be in.
For those tight cuts where the guard simply won’t fit, you can take it off. But you’d better have a push stick in hand, and your fingers should be nowhere near that blade’s path. There’s no room for error there.
A safer route? Grab a saw with a riving knife, or one where the lower guard retracts on its own. You’ll keep more of your digits that way.
One thing people forget: the guard also traps a good chunk of the dust and debris. Take it off, and you’re breathing in all that concrete and steel grit. The mess gets worse, no question about it.
Kerf width comes down to one simple thing: the thickness of the cut your blade actually makes. Diamond blades run wider than carbide-tipped ones, so they chew out more material and demand more power from the saw. That’s just physics.
On a miter saw, a wide kerf gets you into trouble fast. Thin stock like tile or sheet metal? The blade can bind mid-cut, and that’s when things get sketchy. You’ve got two ways out: feed the material slower, or swap in a narrow-kerf blade designed for thin work.
There’s a trade-off you should know about though. Wider kerfs throw off noticeably more dust. In a closed workshop, that’s not a minor annoyance. It coats everything, gets in your lungs, and makes cleanup a whole project by itself. So weigh your material, your saw’s power, and your tolerance for dust before you pick.
Dust Management and Motor Protection
Diamond dust is abrasive. It wears down the saw’s bearings, the arbor threads, and the slide mechanism. Connect a shop vac or a dust extractor to the saw’s dust port, and consider a dust shroud that fits around the blade guard. Wet cutting eliminates dust but requires a water source and a way to contain the slurry. If you’re dry cutting, wear a respirator and clean the saw thoroughly after each session. Compressed air helps, but a vacuum is better because it doesn’t blow dust deeper into the motor.
Here’s the thing about diamond dust: it’s basically ground-up grit, and grit destroys moving parts. Bearings, arbor threads, the whole slide mechanism, all of it gets chewed up over time. So what do you do? Hook a shop vac or a dust extractor to the saw’s dust port. A dust shroud that fits around the blade guard is worth considering too.
Wet cutting sidesteps the dust problem entirely, but then you need a water source and a way to deal with the slurry. That’s a hassle for most people.
If you’re dry cutting, don’t skip the respirator. And clean the saw thoroughly after every session. Compressed air can work, but a vacuum’s actually better, since air just pushes the dust deeper into the motor where it can do real damage.
Frequently Asked Questions
Sure, you can run a diamond blade on a regular wood-cutting miter saw. The catch? Your arbor size has to match, and the blade’s max RPM needs to sit above what your saw actually spins.
That’s the easy part.
The harder part is the mess. Masonry and tile throw off super fine dust, and that stuff gets everywhere. It can work its way into the motor and grind things down over time, which is a slow way to kill your saw. So you’ll want a solid dust collection setup, maybe a shop vac hooked right up to the port, and definitely a mask for yourself. Don’t skip that part.
So yes, it works. Just don’t ignore the cleanup.
Segmented rim blades and continuous rim blades serve completely different jobs. You can’t just swap one for the other and expect the same result.
A segmented rim blade features distinct gaps between each diamond segment. Those openings aren’t just for show. They let air rush through the blade during dry cutting, pulling heat away so the steel doesn’t warp or glaze over. That’s why contractors reach for segmented rims when they’re running a cutoff saw on concrete or masonry without a water source nearby.
Continuous rim blades take the opposite approach. The edge runs smooth, no breaks at all. That uninterrupted diamond surface is what gives you those clean, chip-free cuts on porcelain tile or natural stone. But here’s the catch: without gaps, there’s nowhere for heat to escape. Run it dry and you’ll cook the blade. So you pair it with water. Wet cutting keeps the temperature down and flushes away the slurry.
Pick segmented for dry work and speed. Pick continuous for wet tile jobs where the cut quality matters more than anything.
Do I need water to cut tile with a miter saw?
No. But you really should grab a dry-cutting diamond blade with a segmented or turbo rim if you’re going to try it. That’s the part people often skip.
Water does help keep things cool and knocks down the dust cloud, sure. But here’s the catch: a miter saw just isn’t built for wet conditions. You run water anywhere near the motor or the bearings, and you’re asking for trouble. Rust, electrical shorts, premature wear. It’s a gamble.
If you’re cutting tile on a regular basis, a dedicated tile saw with a water tray is the smarter buy. That’s the tool designed for the job, plain and simple.
Got a new blade sitting there, wondering if it’ll work on your miter saw?
First thing to check is the arbor size. Most saws run either 5/8 inch or 1 inch, though you should verify that before buying anything. The blade diameter matters too — 10 and 12 inches are the standards you’ll see, but your saw’s guard and table opening dictate what physically fits.
Here’s the part people skip: RPM ratings. The blade’s maximum rated speed needs to match or exceed your saw’s no-load speed. Run a blade slower than its rating and you’re asking for trouble. A blade spinning faster than its rating is a disaster waiting to happen.
Got an arbor hole that’s too big for the shaft? A reducing ring solves that in about thirty seconds. They’re cheap, too.
So measure twice, check those three numbers, and you’re good to go.
Can a diamond blade cut wood?
No. And if you try it, you’ll regret it fast.
Diamond blades are built for hard, abrasive materials—masonry, tile, stone, and sometimes metal. Wood doesn’t fit that profile. Run a diamond blade through a piece of pine and you’ll get friction, scorch marks, and a thick cloud of smoke before you’ve made it halfway through the cut. The blade will also dull quicker than you’d expect, because the resin bond that holds the diamonds in place wasn’t designed to handle soft, fibrous material.
So what should you use instead? A carbide-tipped blade. That’s the standard answer for woodworking, and it’s the right one. Carbide teeth shear through fibers cleanly, leaving a smooth edge and keeping the saw running at a safe speed.
Here’s the thing: people ask this question because they’re wondering if they can save a trip to the store. The answer is still no. You’ll spend more time cleaning up the mess and replacing the ruined blade than you would have just buying the correct one in the first place.
Final Thoughts on Diamond Blades and Miter Saws
Slap a diamond blade on your miter saw and you can handle the occasional masonry or tile job. But let’s be honest: it’s not a substitute for the right equipment. You still need to match the blade’s arbor and RPM rating to your saw. Pick a segmented rim for dry cutting, a continuous rim when water’s involved. And whatever you do, leave that blade guard alone.
Here’s the thing nobody warns you about. The dust. It gets everywhere, coats your lungs, and makes a mess of your shop. So budget for a decent vacuum and a respirator before you make that first cut.
If tile work is a weekly occurrence, do yourself a favor and buy a tile saw. That’s the real answer. But if you’re trimming a few pavers once a year? A diamond blade on your miter saw handles it fine, provided you respect both the tool and the material. Safety isn’t complicated. It’s just non-negotiable.